Winter Holiday Baking 7 Must Try Cookies
Get into the holiday spirit with these 7 must try winter holiday baking recipes. Perfect for sharing with family and friends.
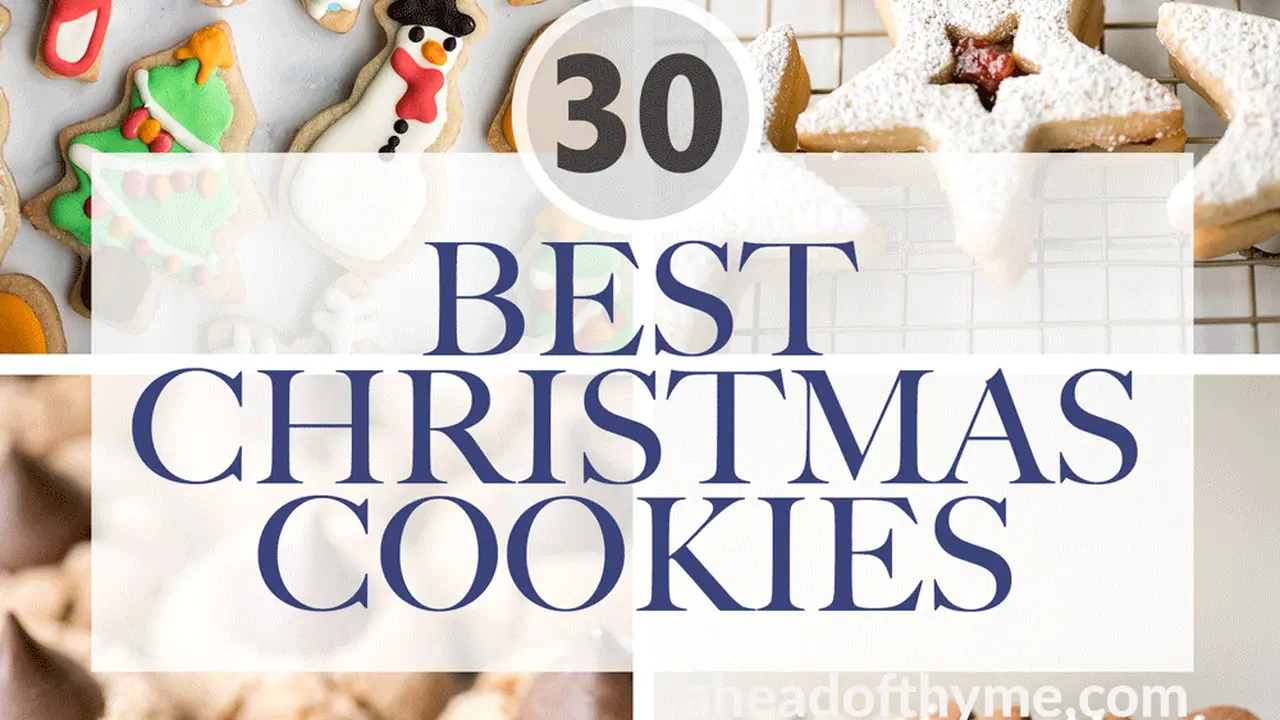
Get into the holiday spirit with these 7 must try winter holiday baking recipes. Perfect for sharing with family and friends. The holiday season is upon us, and what better way to celebrate than by filling your home with the irresistible aroma of freshly baked cookies? Whether you're hosting a festive gathering, looking for the perfect homemade gift, or simply want to indulge in some sweet treats, our guide to the 7 must-try winter holiday cookies has got you covered. We'll dive into classic recipes, offer tips for perfect execution, and even recommend some essential baking tools to make your holiday baking a breeze.
The Ultimate Chocolate Chip Cookie Recipe for Holiday Gatherings
Let's start with a timeless favorite that never disappoints: the chocolate chip cookie. While it's a year-round staple, a perfectly baked, warm chocolate chip cookie during the holidays just hits different. We're talking about a cookie with crispy edges, a chewy center, and melty chocolate chips in every bite. This recipe is designed to be foolproof and delicious, making it ideal for sharing with family and friends.
Ingredients and Preparation for Perfect Chocolate Chip Cookies
- 2 ¼ cups all-purpose flour
- 1 teaspoon baking soda
- 1 teaspoon salt
- 1 cup (2 sticks) unsalted butter, softened
- ¾ cup granulated sugar
- ¾ cup packed light brown sugar
- 1 teaspoon vanilla extract
- 2 large eggs
- 2 cups (12 ounces) semi-sweet chocolate chips (or a mix of milk and dark for complexity)
Instructions:
- Preheat your oven to 375°F (190°C). Line baking sheets with parchment paper or silicone baking mats.
- In a small bowl, whisk together the flour, baking soda, and salt.
- In a large bowl, cream together the softened butter, granulated sugar, and brown sugar until light and fluffy.
- Beat in the vanilla extract and then the eggs, one at a time, mixing well after each addition.
- Gradually add the dry ingredients to the wet ingredients, mixing until just combined. Do not overmix.
- Stir in the chocolate chips.
- Drop rounded tablespoons of dough onto the prepared baking sheets, about 2 inches apart.
- Bake for 9-11 minutes, or until the edges are golden brown and the centers are still slightly soft.
- Let cool on the baking sheets for a few minutes before transferring to a wire rack to cool completely.
Recommended Baking Tools for Chocolate Chip Cookies
To achieve the best results, having the right tools is crucial. For chocolate chip cookies, I highly recommend:
- KitchenAid Stand Mixer: The KitchenAid Artisan Series 5 Quart Stand Mixer (around $400-$450) is a workhorse. Its powerful motor and various attachments make creaming butter and sugar effortless, ensuring a consistent dough every time.
- Nordic Ware Natural Aluminum Commercial Baker's Half Sheet: These baking sheets (around $15-$20 each) are fantastic for even heat distribution, preventing burnt bottoms and ensuring uniform baking.
- Silpat Non-Stick Silicone Baking Mat: A set of two Silpat mats (around $25-$30) is a game-changer. They provide a non-stick surface, eliminate the need for parchment paper, and promote even baking.
- OXO Good Grips Medium Cookie Scoop: This scoop (around $15) ensures uniform cookie size, leading to consistent baking and a professional look.
Festive Gingerbread Cookies A Holiday Classic for All Ages
Gingerbread cookies are synonymous with the holidays. Their warm spices and delightful aroma instantly evoke a sense of festive cheer. Plus, they're incredibly fun to decorate, making them a perfect activity for families.
Ingredients and Decorating Tips for Gingerbread Cookies
- 3 cups all-purpose flour
- 1 teaspoon baking soda
- ½ teaspoon salt
- 1 tablespoon ground ginger
- 1 teaspoon ground cinnamon
- ½ teaspoon ground cloves
- ¼ teaspoon ground nutmeg
- ½ cup (1 stick) unsalted butter, softened
- ½ cup packed dark brown sugar
- 1 large egg
- ½ cup molasses
- Royal icing for decorating
Instructions:
- In a large bowl, whisk together the flour, baking soda, salt, ginger, cinnamon, cloves, and nutmeg.
- In a separate bowl, cream together the softened butter and brown sugar until light and fluffy.
- Beat in the egg and molasses until well combined.
- Gradually add the dry ingredients to the wet ingredients, mixing until a stiff dough forms.
- Divide the dough in half, flatten each half into a disk, wrap in plastic wrap, and chill for at least 2 hours (or overnight).
- Preheat oven to 350°F (175°C). On a lightly floured surface, roll out one disk of dough to about ¼ inch thickness.
- Cut out shapes using cookie cutters. Transfer to prepared baking sheets.
- Bake for 8-10 minutes, or until the edges are firm. Let cool completely before decorating with royal icing.
Essential Cookie Cutters and Decorating Supplies
For gingerbread cookies, you'll want a good set of cookie cutters and decorating tools:
- Wilton Holiday Cookie Cutter Set: This set (around $10-$15) typically includes various festive shapes like gingerbread men, stars, and trees, perfect for the holidays.
- Piping Bags and Tips: A basic set of disposable piping bags and a few small round tips (like Wilton Round Tip 3, around $5-$10) are essential for intricate royal icing designs.
- Food Coloring Gels: Brands like Americolor or Wilton (around $15-$20 for a basic set) offer vibrant colors that won't thin out your icing.
Classic Sugar Cookies for Holiday Decorating and Gifting
Sugar cookies are the ultimate canvas for holiday creativity. Their simple flavor allows for endless decorating possibilities, making them perfect for personalized gifts or a fun family activity.
Recipe and Decorating Ideas for Sugar Cookies
- 2 ½ cups all-purpose flour
- 1 teaspoon baking powder
- ½ teaspoon salt
- 1 cup (2 sticks) unsalted butter, softened
- 1 ½ cups granulated sugar
- 1 large egg
- 1 teaspoon vanilla extract
- Optional: almond extract for a different flavor profile
Instructions:
- In a medium bowl, whisk together the flour, baking powder, and salt.
- In a large bowl, cream together the softened butter and granulated sugar until light and fluffy.
- Beat in the egg and vanilla extract (and almond extract, if using) until well combined.
- Gradually add the dry ingredients to the wet ingredients, mixing until just combined.
- Divide the dough in half, flatten each half into a disk, wrap in plastic wrap, and chill for at least 1 hour.
- Preheat oven to 375°F (190°C). On a lightly floured surface, roll out one disk of dough to about ¼ inch thickness.
- Cut out shapes using cookie cutters. Transfer to prepared baking sheets.
- Bake for 8-10 minutes, or until the edges are lightly golden. Let cool completely before decorating.
Comparing Decorating Options: Royal Icing vs. Glaze vs. Buttercream
When it comes to decorating sugar cookies, you have a few popular options, each with its pros and cons:
- Royal Icing: This is the most common choice for intricate designs and a smooth, hard finish. It dries completely, making cookies stackable and shippable. It's made from powdered sugar, meringue powder (or egg whites), and water. It can be a bit tricky to work with initially, requiring different consistencies for outlining and flooding.
- Simple Glaze: A simpler option made from powdered sugar and milk or lemon juice. It dries to a slightly softer finish than royal icing and is easier to make and apply. Great for a quick, colorful coating.
- Buttercream Frosting: While delicious, buttercream remains soft and is not ideal for stacking or shipping. It's best for cookies that will be eaten quickly and offers a rich, creamy texture.
Peppermint Bark Cookies A Minty Twist for Holiday Treats
For those who love the refreshing taste of peppermint during the holidays, peppermint bark cookies are a must-try. They combine the classic chocolate cookie with a delightful crunch and cool minty flavor.
Ingredients and Variations for Peppermint Bark Cookies
- 1 ½ cups all-purpose flour
- ½ cup unsweetened cocoa powder
- 1 teaspoon baking soda
- ¼ teaspoon salt
- ¾ cup (1 ½ sticks) unsalted butter, softened
- 1 ½ cups granulated sugar
- 1 large egg
- 1 teaspoon vanilla extract
- 1 cup white chocolate chips
- ½ teaspoon peppermint extract
- ½ cup crushed candy canes or peppermint candies
Instructions:
- Preheat oven to 350°F (175°C). Line baking sheets with parchment paper.
- In a medium bowl, whisk together the flour, cocoa powder, baking soda, and salt.
- In a large bowl, cream together the softened butter and granulated sugar until light and fluffy.
- Beat in the egg and vanilla extract until well combined.
- Gradually add the dry ingredients to the wet ingredients, mixing until just combined.
- Drop rounded tablespoons of dough onto prepared baking sheets.
- Bake for 9-11 minutes, or until set. Let cool completely on a wire rack.
- Once cookies are cool, melt the white chocolate chips in a microwave-safe bowl in 30-second intervals, stirring until smooth. Stir in the peppermint extract.
- Dip the top of each cookie into the melted white chocolate, then sprinkle immediately with crushed candy canes. Let set on parchment paper until chocolate hardens.
Product Recommendations for Peppermint Bark Ingredients
Quality ingredients make a difference:
- Ghirardelli White Chocolate Melting Wafers: These (around $5-$7 per bag) melt smoothly and have a great flavor, perfect for dipping.
- Brach's Crushed Peppermint Candy Canes: Conveniently pre-crushed (around $3-$5 per bag), saving you time and effort.
- McCormick Pure Peppermint Extract: A reliable brand (around $4-$6) for consistent and strong peppermint flavor.
Spiced Oatmeal Raisin Cookies A Wholesome Holiday Treat
For those who prefer a slightly healthier, yet equally delicious, holiday cookie, spiced oatmeal raisin cookies are a fantastic choice. They're chewy, full of warm spices, and surprisingly satisfying.
Ingredients and Tips for Chewy Oatmeal Raisin Cookies
- 1 cup (2 sticks) unsalted butter, softened
- 1 cup packed light brown sugar
- ½ cup granulated sugar
- 2 large eggs
- 1 teaspoon vanilla extract
- 1 ½ cups all-purpose flour
- 1 teaspoon baking soda
- 1 teaspoon ground cinnamon
- ½ teaspoon ground nutmeg
- ¼ teaspoon ground cloves
- ½ teaspoon salt
- 3 cups old-fashioned rolled oats
- 1 cup raisins (or dried cranberries for a festive twist)
Instructions:
- Preheat oven to 350°F (175°C). Line baking sheets with parchment paper.
- In a large bowl, cream together the softened butter, brown sugar, and granulated sugar until light and fluffy.
- Beat in the eggs one at a time, then stir in the vanilla extract.
- In a separate bowl, whisk together the flour, baking soda, cinnamon, nutmeg, cloves, and salt.
- Gradually add the dry ingredients to the wet ingredients, mixing until just combined.
- Stir in the rolled oats and raisins until evenly distributed.
- Drop rounded tablespoons of dough onto prepared baking sheets.
- Bake for 10-12 minutes, or until the edges are golden brown and the centers are still soft.
- Let cool on the baking sheets for a few minutes before transferring to a wire rack to cool completely.
Comparing Oat Varieties for Baking
When choosing oats for your cookies, consider these:
- Old-Fashioned Rolled Oats: These are the best for chewy cookies as they retain their shape and texture. (Around $3-$5 for a large container).
- Quick Oats: While convenient, they can make cookies more cake-like and less chewy. Not recommended for this recipe.
- Steel-Cut Oats: Too tough for cookies unless ground first.
Cranberry Orange Shortbread Cookies A Bright and Buttery Delight
Shortbread cookies are wonderfully buttery and melt-in-your-mouth delicious. Adding cranberries and orange zest gives them a bright, festive flavor that's perfect for the holidays.
Ingredients and Zesting Techniques for Shortbread Cookies
- 1 cup (2 sticks) unsalted butter, softened
- ½ cup powdered sugar
- 2 cups all-purpose flour
- ¼ teaspoon salt
- Zest of 1 large orange
- ½ cup dried cranberries, finely chopped
Instructions:
- Preheat oven to 325°F (160°C). Line baking sheets with parchment paper.
- In a large bowl, cream together the softened butter and powdered sugar until light and fluffy.
- Gradually add the flour and salt, mixing until just combined and a soft dough forms.
- Stir in the orange zest and chopped dried cranberries.
- Press the dough evenly into an 8x8 inch baking pan, or roll out to ½ inch thickness and cut into desired shapes.
- Bake for 20-25 minutes, or until lightly golden at the edges.
- While still warm, cut into squares or desired shapes. Let cool completely in the pan or on a wire rack.
Recommended Zesters and Citrus Tools
For the best orange zest, consider these tools:
- Microplane Zester/Grater: The Microplane Classic Zester (around $15-$20) is unparalleled for finely zesting citrus without getting the bitter white pith.
- OXO Good Grips Citrus Zester with Channel Knife: A good all-around tool (around $10-$12) if you also want to create decorative citrus peels.
No-Bake Chocolate Peanut Butter Cookies Quick and Easy Holiday Treats
Sometimes, you need a delicious holiday cookie without turning on the oven. No-bake chocolate peanut butter cookies are incredibly easy, quick to make, and satisfy that sweet craving.
Ingredients and Storage Tips for No-Bake Cookies
- 2 cups granulated sugar
- ½ cup milk (any kind)
- ½ cup (1 stick) unsalted butter
- ¼ cup unsweetened cocoa powder
- ½ cup creamy peanut butter
- 1 teaspoon vanilla extract
- 3 cups quick-cooking oats
Instructions:
- In a large saucepan, combine the sugar, milk, butter, and cocoa powder. Bring to a rolling boil over medium heat, stirring constantly.
- Boil for exactly 1 minute, stirring constantly.
- Remove from heat and immediately stir in the peanut butter and vanilla extract until smooth.
- Add the quick-cooking oats and stir until well combined.
- Drop spoonfuls of the mixture onto parchment paper-lined baking sheets.
- Let cool completely at room temperature or chill in the refrigerator until set (about 30 minutes).
Comparing Peanut Butter Brands for No-Bake Cookies
The type of peanut butter can affect the texture:
- Creamy Peanut Butter (e.g., Jif, Skippy): These are ideal for no-bake cookies as their smooth consistency helps bind the ingredients and creates a uniform texture. (Around $3-$6 per jar).
- Natural Peanut Butter: Can be used, but may result in a slightly oilier or crumblier cookie due to oil separation. Stir well before using.
- Crunchy Peanut Butter: Will add texture, but might make the cookies harder to form and less smooth.
Linzer Cookies Elegant and Festive Holiday Biscuits
Linzer cookies are beautiful, elegant, and perfect for a sophisticated holiday spread. These sandwich cookies, filled with fruit preserves, are as delightful to look at as they are to eat.
Ingredients and Assembly for Linzer Cookies
- 1 ½ cups all-purpose flour
- ½ cup almond flour (or finely ground almonds)
- ½ teaspoon baking powder
- ¼ teaspoon salt
- 1 cup (2 sticks) unsalted butter, softened
- ¾ cup granulated sugar
- 1 large egg yolk
- 1 teaspoon vanilla extract
- ½ cup raspberry or apricot preserves
- Powdered sugar for dusting
Instructions:
- In a medium bowl, whisk together the all-purpose flour, almond flour, baking powder, and salt.
- In a large bowl, cream together the softened butter and granulated sugar until light and fluffy.
- Beat in the egg yolk and vanilla extract until well combined.
- Gradually add the dry ingredients to the wet ingredients, mixing until just combined and a soft dough forms.
- Divide the dough in half, flatten each half into a disk, wrap in plastic wrap, and chill for at least 1 hour.
- Preheat oven to 350°F (175°C). On a lightly floured surface, roll out one disk of dough to about ⅛ inch thickness.
- Using a Linzer cookie cutter set (or two different sized round cutters, one with a small center cut-out), cut out shapes. For half of the cookies, cut out the center.
- Transfer to prepared baking sheets. Bake for 8-10 minutes, or until edges are lightly golden.
- Let cool completely on a wire rack.
- Once cool, dust the top halves (with the cut-out centers) with powdered sugar.
- Spread a small amount of preserves on the bottom halves of the cookies. Top with the powdered sugar-dusted halves.
Recommended Linzer Cookie Cutters and Preserves
To make these cookies truly special:
- Fox Run Linzer Cookie Cutter Set: This set (around $15-$25) typically includes various shapes for the center cut-out, making your cookies extra festive.
- Bonne Maman Raspberry Preserves: A high-quality preserve (around $4-$6 per jar) with a rich fruit flavor and good consistency, perfect for filling Linzer cookies.
Baking Essentials and Storage Solutions for Holiday Cookies
Beyond the specific tools for each cookie, having a well-stocked baking pantry and proper storage solutions will make your holiday baking much more enjoyable and efficient.
General Baking Tools and Ingredients
- Digital Kitchen Scale: For precise measurements, especially with flour (around $20-$30). The OXO Good Grips Stainless Steel Food Scale is a popular choice.
- Measuring Cups and Spoons: A good quality set (around $10-$15) is fundamental.
- Rubber Spatulas: Heat-resistant silicone spatulas (around $10-$15 for a set) are indispensable for mixing and scraping bowls.
- Wire Cooling Racks: Essential for allowing cookies to cool evenly and prevent sogginess (around $10-$15 for a set of two).
- Parchment Paper: A baker's best friend for non-stick baking and easy cleanup (around $5-$10 per roll).
- High-Quality Flour: All-purpose flour from brands like King Arthur Baking Company (around $5-$7 for 5 lbs) can make a noticeable difference.
- Pure Vanilla Extract: Avoid imitation vanilla; pure extract (around $8-$12 for 4 oz) offers a much richer flavor.
Best Practices for Storing Holiday Cookies
Proper storage ensures your cookies stay fresh and delicious:
- Airtight Containers: This is key. Glass containers with airtight lids (like Pyrex or Anchor Hocking, around $20-$40 for a set) are excellent for keeping cookies fresh and preventing them from drying out. Plastic containers like Rubbermaid or LocknLock also work well.
- Separating Flavors: Store strongly flavored cookies (like gingerbread or peppermint) separately from milder ones (like sugar cookies) to prevent flavor transfer.
- Layering with Parchment Paper: If stacking cookies, place a piece of parchment paper between layers to prevent sticking.
- Freezing Cookies: Many cookies freeze beautifully. For baked cookies, freeze them in a single layer on a baking sheet until solid, then transfer to an airtight freezer-safe container or bag. They can last for 1-3 months. For dough, wrap tightly in plastic wrap and then foil, and freeze for up to 3 months.
- Room Temperature vs. Refrigerator: Most cookies are best stored at room temperature in an airtight container for up to a week. Only refrigerate if they contain perishable fillings or frostings.
Holiday Cookie Gifting and Presentation Ideas
Once your delicious cookies are baked, presenting them beautifully is part of the holiday fun. Homemade cookies make thoughtful and cherished gifts.
Creative Packaging and Gifting Solutions
- Cookie Tins: Classic and festive, cookie tins (around $5-$15 each, depending on size and design) protect cookies and look great.
- Cellophane Bags with Ribbons: Simple cellophane bags (around $5-$10 for a pack) tied with festive ribbons and a personalized tag make for charming individual gifts.
- Gift Boxes with Tissue Paper: Small cardboard gift boxes (around $1-$3 each) lined with festive tissue paper provide a lovely presentation.
- Mason Jars: Layering different types of cookies in a large mason jar (around $2-$5 each) creates an attractive and reusable gift.
- Cookie Platters: Arrange an assortment of cookies on a decorative platter (around $10-$30) for a stunning centerpiece or hostess gift.
Tips for Transporting Cookies Safely
If you're bringing cookies to a party or shipping them, consider these tips:
- Use Sturdy Containers: Avoid flimsy boxes.
- Cushioning: Use crumpled parchment paper, tissue paper, or even bubble wrap to fill any empty spaces in the container and prevent cookies from shifting and breaking.
- Separate Delicate Cookies: If you have very fragile or intricately decorated cookies, consider packaging them individually or in smaller, separate containers within a larger box.
- Keep Cool: If transporting cookies with perishable ingredients or those prone to melting (like chocolate-dipped ones), use an insulated bag with ice packs.
Baking holiday cookies is more than just making treats; it's about creating memories, sharing joy, and filling your home with warmth and delicious aromas. With these 7 must-try recipes, essential tools, and helpful tips, you're all set for a delightful and delicious holiday baking season. Happy baking!
:max_bytes(150000):strip_icc()/277019-baked-pork-chops-with-cream-of-mushroom-soup-DDMFS-beauty-4x3-BG-7505-5762b731cf30447d9cbbbbbf387beafa.jpg)