Bathroom Deep Clean 3 Essential Steps
Achieve a sparkling clean bathroom with these 3 essential deep clean steps. Maintain hygiene and freshness in your home.
Achieve a sparkling clean bathroom with these 3 essential deep clean steps. Maintain hygiene and freshness in your home.
Bathroom Deep Clean 3 Essential Steps for a Sparkling Home
Welcome to the ultimate guide for transforming your bathroom from drab to fab! We all know the bathroom is one of the most frequently used rooms in any home, and as such, it can quickly accumulate grime, soap scum, and general mess. A regular quick wipe-down is good, but every now and then, your bathroom needs a serious deep clean. This isn't just about making it look good; it's about maintaining hygiene, preventing mold and mildew, and creating a truly fresh and inviting space. Forget those superficial cleans; we're diving deep into the nooks and crannies to ensure every surface sparkles. This comprehensive guide will walk you through three essential steps, offering practical tips, product recommendations, and even a comparison of different cleaning tools to help you achieve professional-level results right at home.
Step 1 Declutter and Prepare Your Bathroom for Deep Cleaning
Before you even think about scrubbing, the first and most crucial step is to declutter and prepare your bathroom. This might seem obvious, but skipping this can make your deep clean much less efficient and effective. Think of it as setting the stage for a masterpiece. You wouldn't paint a canvas without preparing it first, right? The same goes for your bathroom.
Remove Everything from Surfaces and Storage
Start by removing everything from your countertops, shelves, shower caddies, and even inside your medicine cabinet and vanity drawers. This includes toiletries, decorative items, towels, bath mats, and anything else that isn't permanently fixed. This allows you to access every surface without obstruction. It also gives you an opportunity to sort through items you no longer need or that have expired. Be ruthless! If you haven't used it in six months, or if it's an empty bottle, toss it. This decluttering process alone can make your bathroom feel instantly cleaner and more spacious.
Pre Treat Stubborn Stains and Grime
Once everything is cleared, it's time for some pre-treatment. This is where you tackle those stubborn areas that need a little extra help before the main scrub. Think about soap scum on shower doors, hard water stains around faucets, and grout lines that have seen better days. Applying a specialized cleaner and letting it sit for a few minutes (or even longer, as per product instructions) can significantly reduce your scrubbing effort later on.
Recommended Pre Treatment Products and Their Uses
- For Soap Scum and Hard Water Stains:
- Method Daily Shower Cleaner: This plant-based cleaner is great for daily use but also effective for pre-treating light to moderate soap scum. Just spray and let it sit for 5-10 minutes. It's eco-friendly and smells great. Price: Around $4-6.
- CLR Bath & Kitchen Cleaner: For tougher hard water stains and lime scale, CLR is a powerhouse. Spray on affected areas, let it sit for 2-5 minutes, then scrub. Always test in an inconspicuous area first. Price: Around $5-7.
- Bar Keepers Friend Soft Cleanser: This versatile cleanser is excellent for removing rust, hard water stains, and tarnish from porcelain, stainless steel, and fiberglass. Apply a small amount, spread, and let it sit for a minute before scrubbing. Price: Around $3-5.
- For Grout Lines:
- Grout-Eez Grout Cleaner: This product is specifically designed to penetrate and lift dirt from grout. Apply directly to grout lines, let it sit for 5-10 minutes, then scrub with a grout brush. Price: Around $15-20.
- OxiClean Versatile Stain Remover (Paste): Mix OxiClean powder with a little water to form a paste. Apply to grout, let it sit for 15-30 minutes, then scrub. This is a budget-friendly and effective option. Price: Around $8-12 for a large tub.
Comparison of Pre-Treatment Products: While Method is excellent for maintenance and lighter stains, CLR and Bar Keepers Friend are your go-to for more severe hard water and rust issues. For grout, dedicated grout cleaners like Grout-Eez offer targeted action, but a homemade OxiClean paste can be surprisingly effective and more economical. Always ensure good ventilation when using stronger chemical cleaners.
Step 2 The Top Down Deep Cleaning Process for Maximum Efficiency
Now that your bathroom is prepped, it's time for the actual cleaning. The key to efficiency and avoiding re-doing work is to clean from top to bottom. This ensures that any dust, dirt, or cleaning solution that drips down lands on surfaces you haven't cleaned yet, rather than on freshly cleaned areas.
Ceilings Walls and Light Fixtures First
Start with the highest points in your bathroom. Use a duster with an extendable handle to remove cobwebs and dust from the ceiling corners and walls. For light fixtures, carefully wipe them down with a damp cloth. If the light covers are removable, take them down and wash them in the sink with warm soapy water, then dry thoroughly before replacing. Don't forget to wipe down any ceiling vents or exhaust fans – these can accumulate a surprising amount of dust and grime.
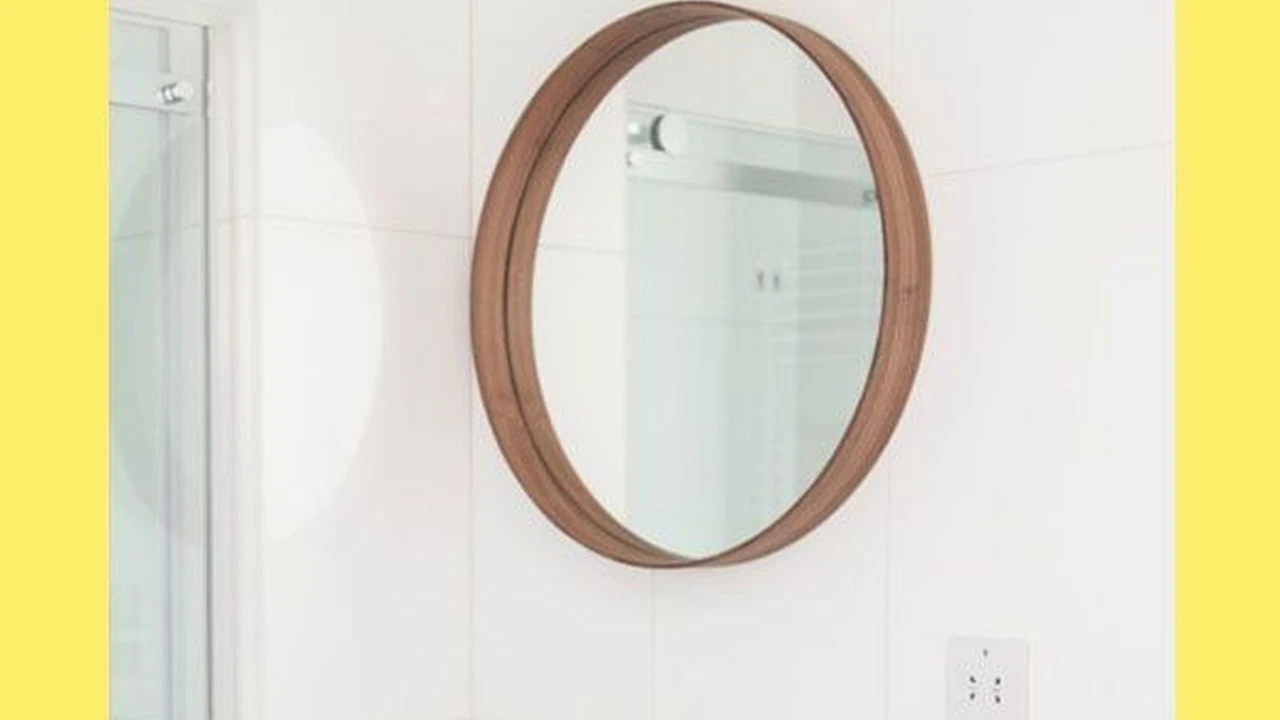
Mirrors Windows and Shower Doors for Streak Free Shine
Next, move to mirrors, windows, and shower doors. These surfaces are prone to streaks, so a good technique is essential. Use a microfiber cloth and a dedicated glass cleaner. Spray the cleaner directly onto the surface, then wipe in an 'S' pattern from top to bottom, overlapping slightly. For shower doors, after cleaning, consider applying a water repellent like Rain-X Shower Door Water Repellent to prevent future soap scum buildup. This creates a hydrophobic layer that makes water bead up and run off, significantly reducing cleaning frequency.
Recommended Glass and Shower Cleaners
- Windex Original Glass Cleaner: A classic for a reason. It delivers streak-free results on mirrors and windows. Price: Around $3-5.
- Invisible Glass Premium Glass Cleaner: Many professional cleaners swear by this one for its superior streak-free performance, especially on shower doors. It contains no soaps, scents, or dyes. Price: Around $6-8.
- Method Daily Shower Cleaner: As mentioned before, this is great for daily maintenance on shower doors, but also effective for a quick wipe down during a deep clean. Price: Around $4-6.
Comparison of Glass Cleaners: Windex is a reliable, budget-friendly option for general glass. Invisible Glass offers a premium, truly streak-free experience, especially valuable for large mirrors or glass shower enclosures. Method is more for preventative maintenance on shower doors, but can be used for light cleaning.
Sinks Countertops and Faucets for Sparkling Fixtures
Now, tackle the sink, countertops, and faucets. Use an all-purpose bathroom cleaner or a disinfectant spray. Spray the entire area, including the faucet, handles, and the basin. Let it sit for a few minutes to allow the cleaner to work. Use a scrub brush or a non-abrasive sponge to scrub away grime and toothpaste residue. For faucets, an old toothbrush can be incredibly effective at getting into those tight crevices around the base and handles. Rinse thoroughly with water and wipe dry with a clean microfiber cloth to prevent water spots.
Recommended All Purpose Bathroom Cleaners
- Clorox Disinfecting Bathroom Cleaner: Excellent for killing germs and tackling tough soap scum and grime. It leaves a fresh scent. Price: Around $4-6.
- Lysol Bathroom Cleaner: Similar to Clorox, Lysol offers strong disinfecting power and effective cleaning for various bathroom surfaces. Price: Around $4-6.
- Seventh Generation Disinfecting Bathroom Cleaner: A plant-based option for those seeking a more natural approach. It uses thymol as a disinfectant and is effective against common household bacteria and viruses. Price: Around $5-7.
Comparison of All-Purpose Cleaners: Clorox and Lysol are strong chemical disinfectants, ideal for thorough sanitization. Seventh Generation provides a more eco-friendly and natural alternative, still effective for disinfection but without harsh chemicals. The choice depends on your preference for chemical strength versus natural ingredients.
Toilets Inside and Out for Ultimate Hygiene
The toilet is next. Start by squirting a generous amount of toilet bowl cleaner under the rim and into the bowl. Let it sit for at least 5-10 minutes, or longer for heavily stained bowls. While the cleaner is working inside, clean the exterior of the toilet. Use a disinfectant spray and a clean cloth to wipe down the tank, the outside of the bowl, the seat (top and bottom), and the base. Pay special attention to the hinges of the seat, as these can accumulate grime. Use a toilet brush to scrub the inside of the bowl, paying attention to the water line and under the rim. Flush to rinse. For tough stains inside the bowl, a pumice stone can be surprisingly effective, but use it gently to avoid scratching the porcelain.
Recommended Toilet Bowl Cleaners
- Clorox Toilet Bowl Cleaner with Bleach: A powerful cleaner that disinfects and whitens. Excellent for tough stains and killing germs. Price: Around $3-5.
- Lysol Power Toilet Bowl Cleaner: Another strong option for deep cleaning and disinfecting, often with a thicker formula that clings to the bowl. Price: Around $3-5.
- Seventh Generation Toilet Bowl Cleaner: A plant-based, non-toxic alternative that still effectively cleans and freshens the bowl. Price: Around $4-6.
Comparison of Toilet Bowl Cleaners: Clorox and Lysol are the heavy-hitters for maximum disinfection and stain removal. Seventh Generation offers a gentler, more environmentally conscious option that still gets the job done for regular cleaning.
Showers and Tubs for a Pristine Bathing Area
Finally, tackle the shower and tub. If you pre-treated, much of the work is already done. Use a scrub brush or a non-abrasive sponge with your chosen bathroom cleaner. Scrub all surfaces: walls, floor, and the tub itself. Pay extra attention to grout lines and corners where mold and mildew tend to accumulate. For stubborn mold, a bleach-based cleaner or a dedicated mold and mildew remover might be necessary. Rinse thoroughly with water, ensuring all cleaner residue is gone, and then wipe dry to prevent water spots.
Recommended Shower and Tub Cleaners
- Scrubbing Bubbles Mega Shower Foamer: This foaming cleaner expands to cover large areas, making it easy to clean shower walls and tubs. Just spray, let it sit, and rinse. Price: Around $5-7.
- Tilex Mold & Mildew Remover: For serious mold and mildew issues, Tilex is highly effective due to its bleach content. Spray, let it sit for a few minutes, then rinse. Always ensure good ventilation. Price: Around $4-6.
- Method Bathroom Cleaner: A more natural option for daily or light cleaning of showers and tubs. It's plant-based and leaves a pleasant scent. Price: Around $4-6.
Comparison of Shower and Tub Cleaners: Scrubbing Bubbles is excellent for general cleaning and ease of use. Tilex is the go-to for tough mold and mildew. Method provides a gentler, more eco-friendly alternative for regular maintenance.
Step 3 Floor Cleaning and Final Touches for a Complete Refresh
You're almost there! The last major step is cleaning the floor, followed by some final touches that truly elevate your bathroom's cleanliness and freshness.
Vacuum or Sweep Then Mop the Floor
Start by vacuuming or sweeping the bathroom floor to pick up any loose dirt, hair, and debris that has fallen during the cleaning process. Pay attention to corners and around the base of the toilet. Once the loose dirt is gone, it's time to mop. Use a clean mop and a suitable floor cleaner for your bathroom's flooring type (tile, vinyl, etc.). Mop the entire floor, paying attention to grout lines if you have tiled floors. For extra dirty grout, a grout brush can be used again here. Rinse the mop frequently in clean water to avoid spreading dirt around. Allow the floor to air dry completely.
Recommended Floor Cleaners and Tools
- Bona Hard-Surface Floor Cleaner: Excellent for tile, laminate, and vinyl floors. It's streak-free and leaves no residue. Price: Around $8-10.
- Pine-Sol Multi-Surface Cleaner: A classic, powerful cleaner that disinfects and leaves a strong, fresh scent. Good for most bathroom floor types. Price: Around $4-6.
- Swiffer WetJet Wood & Floor Cleaner: A convenient all-in-one system for quick and easy floor cleaning. Great for maintenance between deep cleans. Price: Around $20-25 for the starter kit, refills around $10-15.
Comparison of Floor Cleaners: Bona is ideal for those who prefer a residue-free, streak-free finish on hard surfaces. Pine-Sol offers strong cleaning and disinfecting power with a traditional clean scent. Swiffer WetJet provides ultimate convenience for quick cleanups, though it might not be as powerful for deep grime as traditional mopping.
Mop Comparison
- O-Cedar EasyWring Spin Mop & Bucket System: This system allows for hands-free wringing and excellent control over moisture, making it great for various floor types. Price: Around $30-40.
- Bona Spray Mop: Designed to be used with Bona cleaners, this mop offers a fine mist spray and a washable microfiber pad, perfect for streak-free cleaning. Price: Around $25-35.
- Traditional String Mop and Bucket: The most basic and often cheapest option, but requires more effort for wringing and can leave more water on the floor. Price: Around $10-20.
Comparison of Mops: The O-Cedar Spin Mop offers a good balance of efficiency and control. The Bona Spray Mop is excellent for quick, streak-free cleaning, especially with Bona cleaners. Traditional string mops are budget-friendly but less efficient.
Sanitize Trash Cans and Replace Liners
Don't forget the trash can! Empty it, then spray the inside and outside with a disinfectant cleaner. Wipe it down thoroughly, and allow it to air dry before replacing the liner. This prevents odors and keeps your bathroom smelling fresh.
Wipe Down Door Handles and Light Switches
These are high-touch areas that often get overlooked. Use a disinfectant wipe or spray a cloth with disinfectant and wipe down all door handles, light switches, and cabinet pulls. This helps prevent the spread of germs.
Replace Linens and Restock Toiletries
Finally, replace all bath mats, towels, and shower curtains with fresh, clean ones. Restock your toiletries, neatly arranging them back on your now sparkling clean surfaces. Consider adding a fresh air freshener or a diffuser with essential oils to complete the fresh feeling. A small plant can also add a touch of life and freshness to the space.
By following these three essential steps – declutter and prepare, clean from top to bottom, and finish with the floor and final touches – you'll achieve a truly sparkling clean bathroom. This deep cleaning routine not only makes your bathroom look amazing but also contributes to a healthier and more pleasant home environment. Remember, consistency is key, so try to incorporate elements of this deep clean into your regular cleaning schedule to maintain that fresh feeling. Happy cleaning!
:max_bytes(150000):strip_icc()/277019-baked-pork-chops-with-cream-of-mushroom-soup-DDMFS-beauty-4x3-BG-7505-5762b731cf30447d9cbbbbbf387beafa.jpg)