Seasonal Craft Projects 8 Fun DIY Ideas
Unleash your creativity with these 8 fun seasonal craft projects. Personalize your home and gifts with handmade touches.
Unleash your creativity with these 8 fun seasonal craft projects. Personalize your home and gifts with handmade touches. Crafting is a wonderful way to express yourself, add unique flair to your living space, and create thoughtful, personalized gifts for loved ones. Whether you're a seasoned crafter or just starting, there's a project for every skill level and every season. Let's dive into some fantastic DIY ideas that will inspire you throughout the year.
Seasonal Craft Projects 8 Fun DIY Ideas
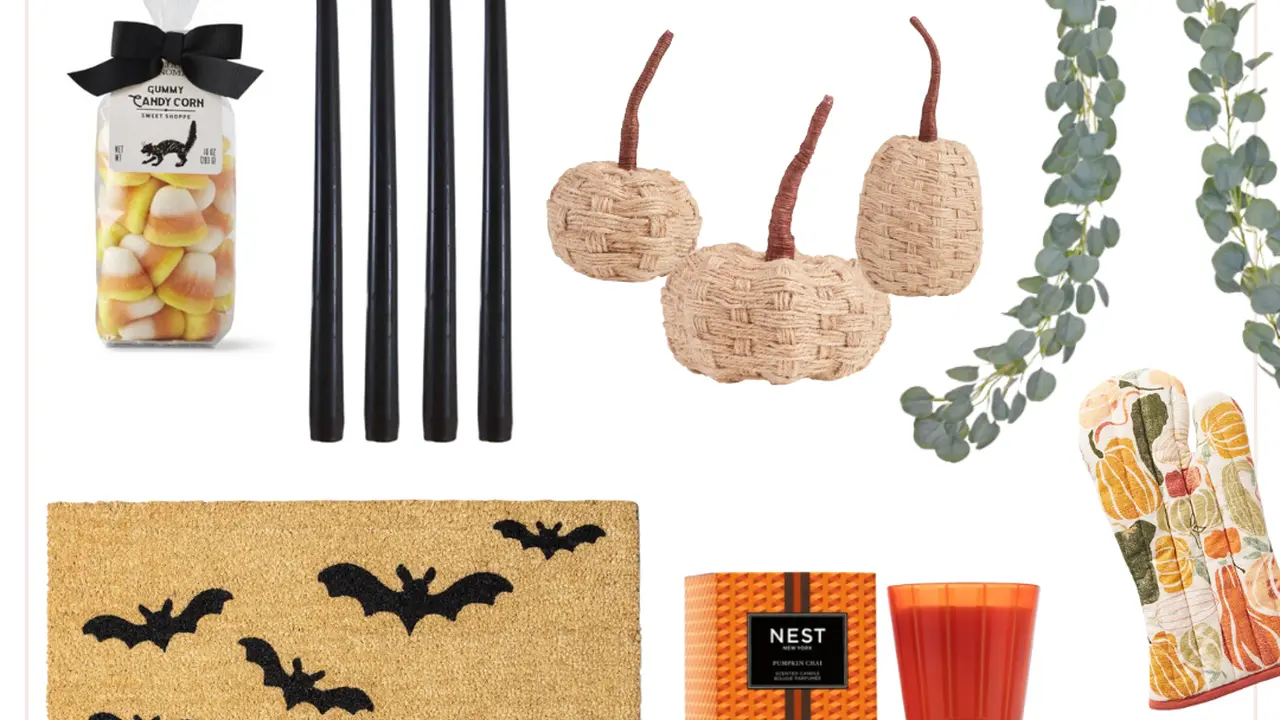
Embracing Autumn Crafts Fall Decor DIYs
As the leaves change and the air gets crisp, autumn crafts bring warmth and coziness into your home. These projects often incorporate natural elements and rich, earthy tones.
DIY Fall Wreaths Best Materials and Styles
A beautiful wreath can instantly transform your front door or a blank wall. Fall wreaths are all about texture and natural elements.
- Project Idea: Rustic Burlap and Leaf Wreath
- Materials Needed: A wire wreath frame (14-inch to 18-inch, typically $3-$7), burlap ribbon (2.5 inches wide, 10-20 yards, $5-$15), artificial fall leaves (2-3 bunches, $4-$10 per bunch), small artificial pumpkins or gourds ($1-$3 each), hot glue gun and glue sticks ($10-$20 for gun, $5 for sticks), floral wire ($3-$5).
- How-To: Start by wrapping the burlap ribbon around the wreath frame, securing it with hot glue or floral wire. Create loops and puffs for volume. Once the frame is covered, begin attaching the artificial leaves, layering them for a full look. Finally, hot glue the small pumpkins or gourds strategically.
- Product Recommendation: For a durable and realistic look, consider 'Nearly Natural' artificial fall leaves, often found on Amazon or at craft stores like Michaels. Their 12-pack of assorted fall leaves costs around $20. For burlap, 'May Arts' wired burlap ribbon is excellent for holding shape, priced at about $12 for a 10-yard roll.
- Comparison: While fresh wreaths are beautiful, artificial ones last for multiple seasons, making them more cost-effective in the long run. Compared to pre-made wreaths (which can range from $30-$100+), DIY allows for customization and significant savings.
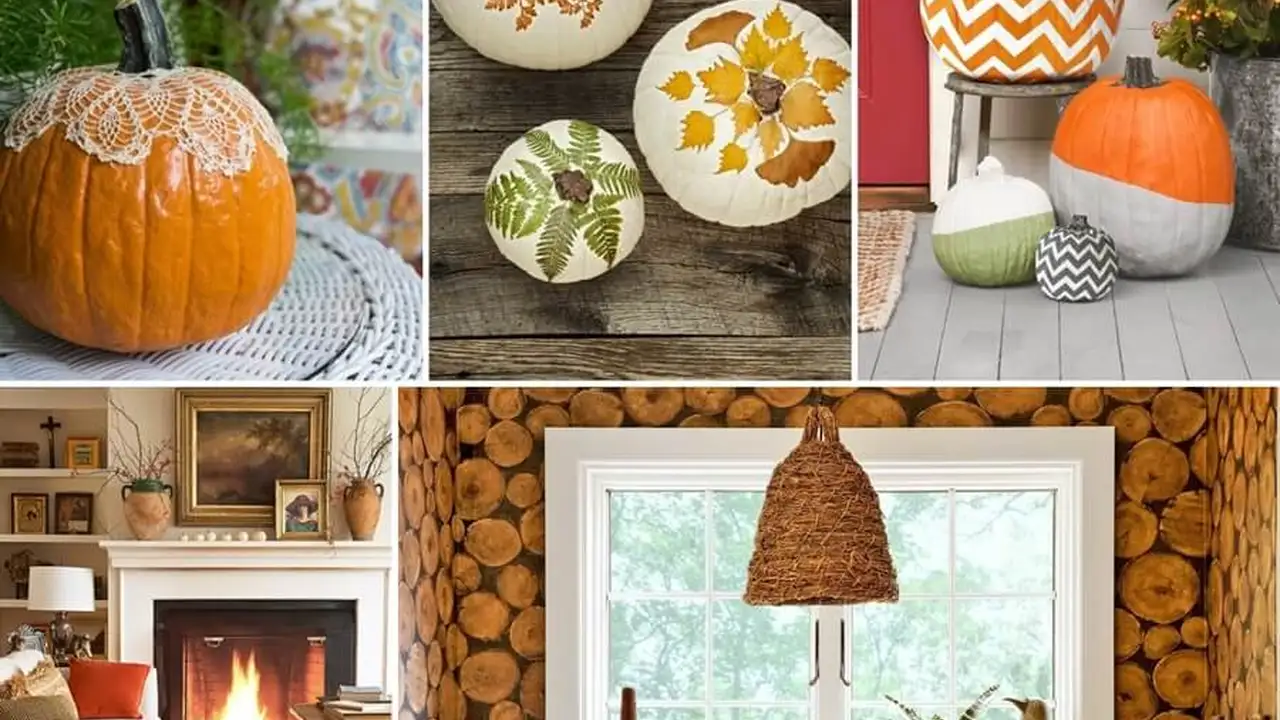
Painted Pumpkin Decor Creative Fall Displays
Move beyond traditional carving and explore the artistic side of pumpkins. Painted pumpkins offer endless possibilities for unique fall decor.
- Project Idea: Elegant Gold Leaf Pumpkins
- Materials Needed: Small to medium-sized craft pumpkins (foam or real, $5-$15 each), gold leaf sheets (a pack of 100 sheets for $10-$20), gold leaf adhesive ($5-$10), soft brush, acrylic paint (white, black, or a dark jewel tone, $3-$5 per bottle), clear sealant spray ($8-$12).
- How-To: Paint your pumpkins with a base color and let them dry completely. Apply a thin layer of gold leaf adhesive to desired areas (e.g., stripes, polka dots, or full coverage). Wait for the adhesive to become tacky, then carefully press gold leaf sheets onto the adhesive. Gently brush away excess leaf. Once dry, seal with a clear spray.
- Product Recommendation: 'Mona Lisa' Speedball Gold Leaf Adhesive is a popular choice for its ease of use, typically around $7. For craft pumpkins, 'Funkins' foam pumpkins are highly rated for their smooth surface and durability, available at craft stores for $8-$15 depending on size.
- Usage Scenario: These elegant pumpkins are perfect for a sophisticated Thanksgiving centerpiece, mantel decor, or as accents on a console table.
Winter Wonderland Crafts Festive Holiday DIYs
Winter crafting often revolves around the holidays, bringing sparkle, warmth, and cheer into your home.
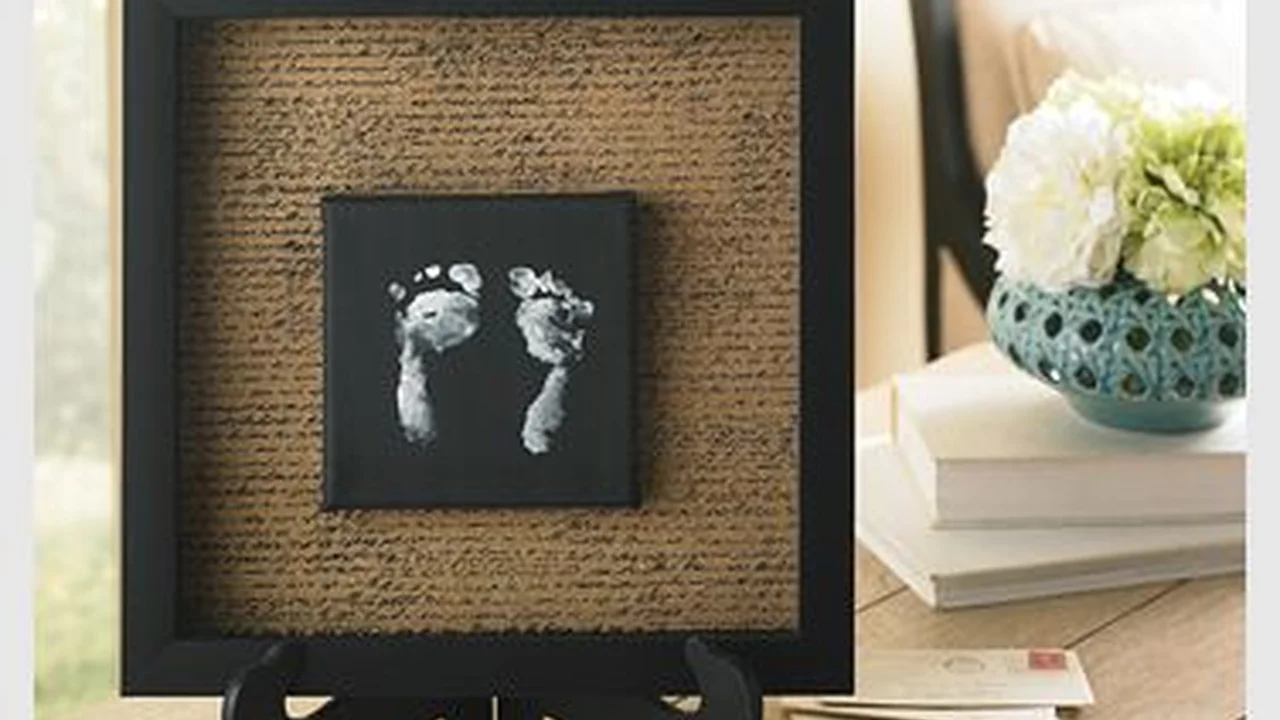
Handmade Ornaments Personalized Tree Decorations
Creating your own ornaments adds a personal touch to your Christmas tree and makes for cherished keepsakes.
- Project Idea: Salt Dough Ornaments for Kids and Adults
- Materials Needed: 1 cup salt, 2 cups flour, 1 cup water, cookie cutters ($5-$15 for a set), baking sheet, parchment paper, acrylic paints ($15-$25 for a set), paintbrushes, glitter (optional, $3-$5), clear sealant spray ($8-$12), ribbon or twine ($3-$5).
- How-To: Mix salt, flour, and water to form a dough. Roll out the dough (about 1/4 inch thick) and cut shapes with cookie cutters. Don't forget to make a hole for hanging! Bake at 250°F (120°C) for 2-3 hours until hardened. Once cooled, paint and decorate. Seal with clear spray and add ribbon.
- Product Recommendation: Any basic all-purpose flour and table salt will work. For paints, 'Apple Barrel' acrylic paints are budget-friendly and come in a wide range of colors, often found at Walmart or craft stores for about $1-$2 per bottle.
- Comparison: Salt dough is a fantastic alternative to ceramic or glass ornaments, being much safer for homes with children or pets, and significantly cheaper than buying pre-made ornaments (which can be $5-$20+ each).
DIY Snow Globes Magical Winter Scenes
Snow globes capture the magic of winter in a small, enchanting world.
- Project Idea: Personalized Photo Snow Globe
- Materials Needed: A clean glass jar with a tight-fitting lid (mason jars work well, $1-$3 each), distilled water, liquid glycerin (1-2 teaspoons, $5-$10 for a bottle), glitter (fine, iridescent, $3-$5), waterproof photo (laminated or printed on waterproof paper), small waterproof figurines or plastic trees ($1-$5 each), waterproof super glue ($3-$5).
- How-To: Glue your photo and figurines to the inside of the jar lid. Let dry completely. Fill the jar almost to the top with distilled water. Add glycerin (helps glitter fall slowly) and glitter. Screw the lid on tightly. You can seal the lid with extra glue for permanence.
- Product Recommendation: 'Gorilla Super Glue Gel' is excellent for its strong, waterproof bond, priced around $4-$6. For glitter, 'Martha Stewart Crafts' fine glitter offers beautiful sparkle, about $4 per jar.
- Usage Scenario: These make charming personalized gifts, festive mantel decorations, or unique additions to a child's room.
Springtime Creations Fresh and Vibrant DIYs
Spring crafts celebrate new beginnings, fresh colors, and the beauty of blooming nature.
Floral Arrangements DIY Centerpieces
Bring the beauty of spring indoors with stunning floral arrangements, whether fresh or artificial.
- Project Idea: Mason Jar Spring Flower Centerpiece
- Materials Needed: Mason jars (pint or quart size, $1-$2 each), acrylic paint (pastel colors, $3-$5 per bottle), twine or ribbon ($3-$5), fresh or artificial spring flowers (tulips, daffodils, hydrangeas, $5-$20 per bunch), floral foam (for artificial flowers, $3-$5).
- How-To: Paint the mason jars in soft pastel shades. Once dry, distress them slightly with sandpaper for a rustic look, if desired. Tie twine or ribbon around the neck of the jars. Arrange your flowers inside. For fresh flowers, fill with water. For artificial, use floral foam to secure them.
- Product Recommendation: 'FolkArt' chalk paint is great for a distressed look on glass, about $5 per bottle. For artificial flowers, 'Afloral' offers high-quality, realistic options, though they can be pricier ($10-$30 per stem). For fresh flowers, local florists or grocery stores like Trader Joe's offer good value.
- Comparison: While fresh flowers offer fragrance and natural beauty, artificial arrangements last indefinitely and require no maintenance, making them a good investment for seasonal decor.
Easter Egg Decorating Beyond the Dye Kit
Easter eggs are a classic spring craft, but there are many ways to decorate them beyond simple dye kits.
- Project Idea: Decoupage Floral Easter Eggs
- Materials Needed: Blown-out or craft eggs (plastic or paper mache, $5-$10 for a dozen), small floral paper napkins or tissue paper with floral patterns ($3-$7 per pack), Mod Podge (matte or gloss, $8-$15), small paintbrush, scissors.
- How-To: Cut out small floral motifs from your napkins/tissue paper. Apply a thin layer of Mod Podge to a section of the egg. Carefully place a floral cutout onto the wet Mod Podge. Gently brush another thin layer of Mod Podge over the top of the cutout, smoothing out any wrinkles. Repeat until the egg is covered. Let dry completely.
- Product Recommendation: 'Mod Podge' is the industry standard for decoupage, available at any craft store. For paper, look for decorative paper napkins at party supply stores or online.
- Usage Scenario: These beautifully decorated eggs make elegant centerpieces, charming additions to an Easter basket, or unique gifts.
Summer Fun Crafts Outdoor and Bright DIYs
Summer crafts are all about bright colors, outdoor activities, and playful themes.
Tie Dye Projects Colorful Apparel and Home Goods
Tie-dye is a classic summer activity that yields vibrant, unique results on fabric.
- Project Idea: Tie-Dye T-Shirts and Tote Bags
- Materials Needed: White cotton t-shirts or tote bags ($5-$10 each), tie-dye kit (includes dyes, rubber bands, gloves, $15-$30), plastic drop cloth, bucket or tub.
- How-To: Prepare your workspace with a drop cloth. Dampen your fabric. Use rubber bands to create patterns (e.g., spiral, crumple, bullseye). Apply dyes according to kit instructions. Let sit for 6-24 hours. Rinse until water runs clear, then wash and dry.
- Product Recommendation: 'Tulip One-Step Tie-Dye Kits' are highly recommended for beginners as they are easy to use and produce vibrant colors, typically $15-$25 for a multi-color kit.
- Comparison: While buying pre-made tie-dye items is convenient, DIY tie-dye allows for complete creative control over colors and patterns, and it's a fun group activity.
DIY Citronella Candles Outdoor Ambiance and Pest Control
Create a pleasant outdoor atmosphere while keeping pesky insects at bay with homemade citronella candles.
- Project Idea: Mason Jar Citronella Candles
- Materials Needed: Mason jars (pint or half-pint, $1-$2 each), soy wax flakes (2-5 lbs, $15-$30), candle wicks with bases ($5-$10 for a pack), wick clips or clothespins, citronella essential oil (1 oz, $8-$15), double boiler or microwave-safe container, thermometer, stirring stick.
- How-To: Melt soy wax using a double boiler or microwave. Once melted (around 180°F/82°C), remove from heat and let cool slightly (to about 160°F/71°C). Add citronella essential oil (about 1 oz per pound of wax). Secure a wick to the bottom of each mason jar and use a wick clip or clothespin to keep it centered. Pour wax into jars. Let cool completely. Trim wick to 1/4 inch.
- Product Recommendation: 'CandleScience' offers high-quality soy wax flakes and wicks, with 5 lbs of soy wax costing around $25. 'NOW Foods' citronella essential oil is a reliable choice, about $10 for a 1 oz bottle.
- Usage Scenario: Perfect for outdoor patios, decks, and camping trips, providing both light and insect repellent.
:max_bytes(150000):strip_icc()/277019-baked-pork-chops-with-cream-of-mushroom-soup-DDMFS-beauty-4x3-BG-7505-5762b731cf30447d9cbbbbbf387beafa.jpg)