Kitchen Appliance Care 7 Maintenance Tips
{ "article": [ { "title": "Kitchen Appliance Care 7 Maintenance Tips", "meta_description": "Extend the life of your kitchen appliances with these 7 essential maintenance tips. Keep them running efficiently.", "content": "Extend the life of your kitchen appliances with these 7 essential maintenance tips. Keep them running efficiently.\n\n
\n\n
Why Regular Kitchen Appliance Maintenance Matters for Longevity and Efficiency
\n\nLet's be real, our kitchen appliances are the unsung heroes of our homes. From brewing that morning coffee to keeping our food fresh and cooking up delicious meals, they work tirelessly. But just like any workhorse, they need a little TLC to keep performing at their best. Regular maintenance isn't just about preventing breakdowns; it's about extending their lifespan, ensuring they run efficiently (which saves you money on energy bills!), and keeping your kitchen a safe and hygienic place. Think of it as a small investment of your time that pays off big in the long run. Neglecting these vital machines can lead to costly repairs, premature replacements, and even potential safety hazards. So, let's dive into how you can keep your kitchen's MVPs in top shape.
\n\nRefrigerator Care Keeping Your Food Fresh and Energy Bills Low
\n\nYour refrigerator is probably the hardest working appliance in your kitchen, running 24/7. Proper care is crucial for food safety and energy efficiency.
\n\nClean the Condenser Coils for Optimal Cooling Performance
\n\nThis is a big one, and often overlooked! The condenser coils dissipate heat from the refrigerant. When they're covered in dust and pet hair, your fridge has to work harder, using more energy and potentially shortening its life. You should aim to clean these at least twice a year, or more often if you have pets.
\n\n- \n
- How to do it: First, unplug your refrigerator for safety. The coils are usually located at the back or underneath the unit. You might need to pull the fridge away from the wall or remove a kick plate. Use a vacuum cleaner with a brush attachment to gently remove dust and debris. For stubborn grime, a coil brush (you can find these at hardware stores) works wonders. \n
- Recommended Product: Appliance Brush Kit by Everbilt (around $10-$15). This kit often includes a long, flexible brush perfect for reaching those tricky spots behind and under your fridge. \n
- Usage Scenario: Ideal for annual or bi-annual deep cleaning sessions. \n
- Comparison: While a regular vacuum attachment works, a dedicated coil brush gets into tighter spaces and dislodges more dust, leading to more efficient cleaning. \n
Check and Clean the Door Gaskets for Air Tight Seals
\n\nThose rubber seals around your fridge and freezer doors are vital for keeping cold air in and warm air out. If they're dirty or damaged, your fridge will constantly be trying to cool, wasting energy.
\n\n- \n
- How to do it: Inspect the gaskets regularly for cracks, tears, or stiffness. Clean them with a mild soap and water solution. You can test the seal by closing the door on a dollar bill; if it pulls out easily, the seal might be compromised. \n
- Recommended Product: A simple solution of warm water and a few drops of dish soap. For stubborn grime, a mixture of equal parts white vinegar and water can be effective. \n
- Usage Scenario: Monthly quick wipe-downs and a more thorough inspection every few months. \n
- Comparison: Avoid harsh chemical cleaners as they can degrade the rubber over time. \n
Maintain Proper Temperature Settings for Food Safety
\n\nThe ideal temperature for your refrigerator is between 35°F and 38°F (1.7°C and 3.3°C), and for your freezer, it should be 0°F (-18°C) or lower. Fluctuations can lead to food spoilage and increased energy consumption.
\n\n- \n
- How to do it: Use an appliance thermometer to verify the internal temperature, as the dial settings aren't always perfectly accurate. Adjust as needed. \n
- Recommended Product: Taylor Precision Products Refrigerator/Freezer Thermometer (around $5-$10). These are inexpensive and provide accurate readings. \n
- Usage Scenario: Check temperatures monthly, especially after power outages or if you notice food spoiling quickly. \n
- Comparison: Digital thermometers can be more precise, but a simple analog one is usually sufficient for this purpose. \n
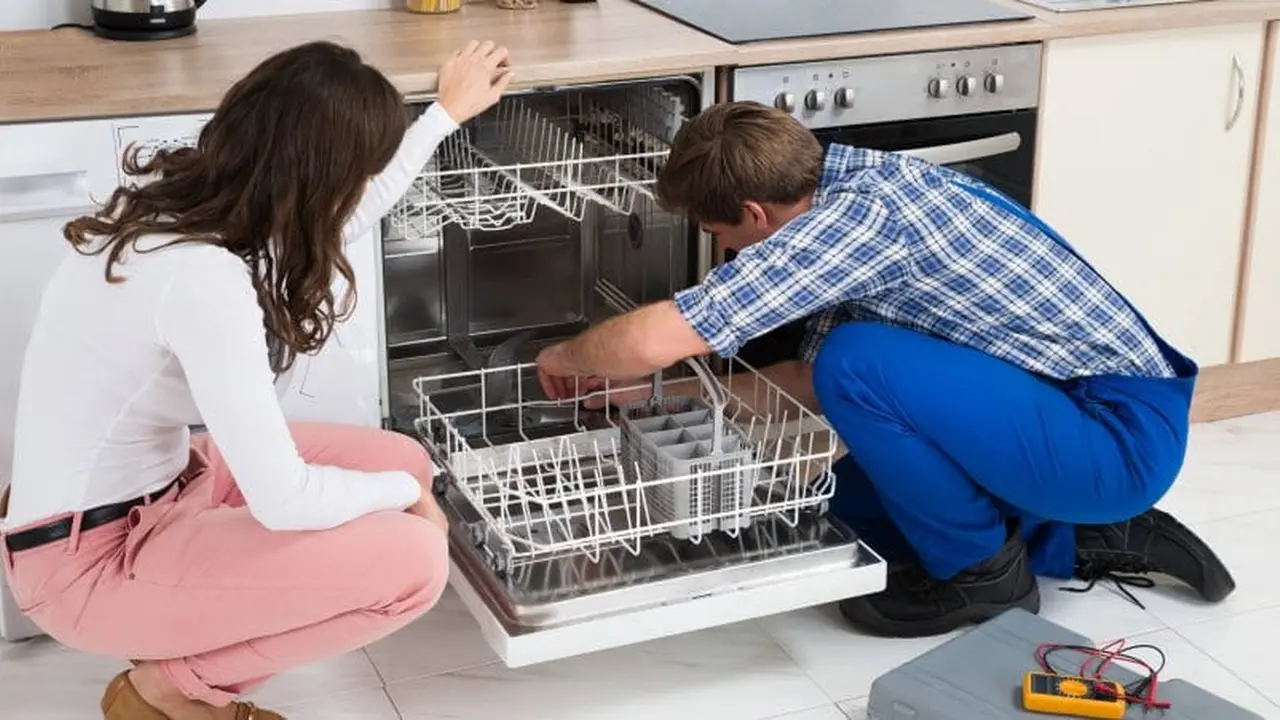
Dishwasher Maintenance Ensuring Sparkling Dishes and Longevity
\n\nA dishwasher is a huge time-saver, but it needs attention to prevent odors, clogs, and inefficient cleaning.
\n\nClean the Filter Regularly for Optimal Washing
\n\nMost modern dishwashers have a removable filter that traps food particles. If this filter gets clogged, your dishes won't get clean, and you might notice unpleasant odors.
\n\n- \n
- How to do it: Consult your dishwasher's manual to locate and remove the filter (it's usually at the bottom of the tub). Rinse it under running water to remove food debris. For stubborn grease, use an old toothbrush and a little dish soap. \n
- Recommended Product: No specific product needed, just warm water and dish soap. \n
- Usage Scenario: Clean weekly or bi-weekly, depending on how often you use your dishwasher and what you wash. \n
- Comparison: Some older dishwashers have self-cleaning filters, but most newer models require manual cleaning. \n
Run a Cleaning Cycle with Vinegar or Dishwasher Cleaner for Freshness
\n\nEven with filter cleaning, mineral deposits, grease, and food residue can build up inside your dishwasher, leading to odors and less effective cleaning.
\n\n- \n
- How to do it: Once a month, run an empty hot water cycle with a cup of white vinegar placed in a top-rack safe bowl. Alternatively, use a specialized dishwasher cleaner. \n
- Recommended Product: Finish Dishwasher Cleaner (around $4-$6 for a pack of 3). These come in a small bottle that you place upside down in the bottom rack. \n
- Usage Scenario: Monthly deep clean to remove hard water stains and odors. \n
- Comparison: Vinegar is a natural and cost-effective option, while commercial cleaners are formulated to tackle specific issues like limescale and grease more aggressively.
Oven and Stove Top Care Keeping Your Cooking Area Pristine and Safe
\n\nSpills and splatters are inevitable when cooking, but regular cleaning of your oven and stovetop prevents baked-on grime and potential fire hazards.
\n\nClean Spills Immediately to Prevent Baked On Residue
\n\nThe easiest way to clean a spill is right after it happens, before it has a chance to bake onto the surface.
\n\n- \n
- How to do it: For stovetops, wipe up spills with a damp cloth as soon as the surface is cool enough to touch. For oven spills, if it's a fresh spill and the oven is off and cool, wipe it up. If it's baked on, you'll need a more thorough approach. \n
- Recommended Product: A damp microfiber cloth and a mild all-purpose cleaner for stovetops. \n
- Usage Scenario: After every cooking session. \n
- Comparison: Immediate cleaning saves a lot of scrubbing later. \n
Utilize Self Cleaning Features or Oven Cleaners for Deep Cleaning
\n\nFor those tougher, baked-on messes in your oven, you have a couple of options.
\n\n- \n
- How to do it: If your oven has a self-cleaning feature, follow the manufacturer's instructions carefully. Be aware that self-cleaning cycles can produce strong odors and high heat. If not, or if you prefer, use a commercial oven cleaner. Spray the cleaner, let it sit for the recommended time, and then wipe away the grime. Always wear gloves and ensure good ventilation. \n
- Recommended Product: Easy-Off Heavy Duty Oven Cleaner (around $5-$7). This is a popular and effective choice for tackling tough grease and baked-on food. \n
- Usage Scenario: Every 3-6 months, or as needed based on usage. \n
- Comparison: Self-cleaning is convenient but energy-intensive and can be smoky. Chemical cleaners are effective but require careful handling and ventilation. \n
Microwave Oven Care Preventing Odors and Ensuring Even Heating
\n\nMicrowaves are prone to food splatters and lingering odors. Regular cleaning keeps them hygienic and efficient.
\n\nWipe Down Interior Surfaces Regularly for Cleanliness
\n\n- \n
- How to do it: After each use, or at least daily, wipe down the interior with a damp cloth. For dried-on food, place a bowl of water with a few lemon slices or a tablespoon of white vinegar inside, microwave on high for 2-3 minutes until steamy, then let it sit for 5 minutes. The steam will loosen the grime, making it easy to wipe away. \n
- Recommended Product: A simple solution of water and lemon slices or white vinegar. \n
- Usage Scenario: Daily quick wipe, weekly deep clean with steam. \n
- Comparison: Natural methods like lemon or vinegar are effective and leave a fresh scent without harsh chemicals. \n
Small Appliance Care Extending the Life of Your Countertop Companions
\n\nDon't forget your smaller appliances like coffee makers, toasters, and blenders. They also need regular attention.
\n\nDescaling Coffee Makers for Better Taste and Performance
\n\nMineral deposits (limescale) can build up in your coffee maker, affecting taste and slowing down brewing.
\n\n- \n
- How to do it: Fill the water reservoir with equal parts white vinegar and water. Run a brewing cycle halfway, then pause for 30 minutes to an hour to let the solution work. Finish the cycle, then run 2-3 cycles with plain water to rinse thoroughly. \n
- Recommended Product: White vinegar (around $3-$5 for a large bottle). \n
- Usage Scenario: Monthly or every 40-80 brewing cycles, depending on your water hardness. \n
- Comparison: Commercial descaling solutions are available, but vinegar is a cheap and effective alternative. \n
Clean Toaster Crumb Trays to Prevent Fire Hazards
\n\nAccumulated crumbs in your toaster are a fire risk and can attract pests.
\n\n- \n
- How to do it: Unplug the toaster. Pull out the crumb tray (usually at the bottom) and empty it into the trash. Wipe it clean with a damp cloth. You can also gently shake the toaster over a sink to dislodge any remaining crumbs. \n
- Recommended Product: No specific product, just a damp cloth. \n
- Usage Scenario: Weekly or bi-weekly, depending on usage. \n
- Comparison: This is a simple, essential safety measure. \n
Blender Blade and Gasket Cleaning for Hygiene and Efficiency
\n\nFood particles can get trapped under blender blades and in gaskets, leading to odors and bacterial growth.
\n\n- \n
- How to do it: After each use, rinse the blender jar immediately. For a quick clean, fill the jar with warm water and a drop of dish soap, then blend for 30 seconds. For a deeper clean, disassemble the blades and gaskets (if removable) and wash them thoroughly with soap and water. Use a small brush to get into crevices. \n
- Recommended Product: A bottle brush or small cleaning brush for tight spots (around $5-$10). \n
- Usage Scenario: Quick rinse after every use, deep clean weekly or as needed. \n
- Comparison: Immediate rinsing prevents food from drying and sticking, making deep cleaning easier. \n
General Tips for All Kitchen Appliances Maximizing Lifespan and Performance
\n\nBeyond specific appliance care, some general practices apply to all your kitchen workhorses.
\n\nRead Your Appliance Manuals for Specific Care Instructions
\n\nThis might sound obvious, but your appliance's manual is a treasure trove of information. It contains specific cleaning instructions, troubleshooting tips, and maintenance schedules unique to your model. Don't just toss it aside!
\n\n- \n
- How to do it: Keep your manuals organized, perhaps in a binder or a digital folder. Refer to them whenever you have a question or before performing maintenance. \n
- Usage Scenario: Before first use, and whenever you need specific guidance. \n
Use Appliance Specific Cleaners When Necessary for Best Results
\n\nWhile natural solutions like vinegar and baking soda are great for many tasks, sometimes a specialized cleaner is best, especially for tough stains or specific materials.
\n\n- \n
- Recommended Product: For stainless steel appliances, Weiman Stainless Steel Cleaner & Polish (around $8-$12) is excellent for removing fingerprints and streaks, leaving a protective shine. For glass cooktops, Cerama Bryte Ceramic Cooktop Cleaner (around $7-$10) is designed to safely remove burnt-on food without scratching. \n
- Usage Scenario: For specific cleaning challenges or to maintain the finish of particular materials. \n
- Comparison: While general cleaners might work, appliance-specific ones are formulated to be safe and effective for the material they're designed for. \n
Avoid Harsh Abrasive Cleaners and Scouring Pads to Protect Surfaces
\n\nUsing abrasive cleaners or rough scouring pads can scratch and damage the surfaces of your appliances, making them look dull and potentially compromising their integrity.
\n\n- \n
- How to do it: Stick to soft cloths, sponges, and non-abrasive cleaners. If you have a tough spot, try soaking it first or using a specialized cleaner designed for that surface. \n
- Recommended Product: Microfiber cloths (around $10-$15 for a multi-pack). They are gentle yet effective for cleaning and polishing. \n
- Usage Scenario: For all routine cleaning. \n
- Comparison: Microfiber cloths are superior to paper towels or rough sponges for delicate surfaces. \n
Ensure Proper Ventilation When Cleaning with Chemicals for Safety
\n\nIf you do use chemical cleaners, especially oven cleaners or strong degreasers, always ensure your kitchen is well-ventilated. Open windows, turn on exhaust fans, and consider wearing a mask.
\n\n- \n
- How to do it: Prioritize fresh air circulation. \n
- Usage Scenario: Whenever using strong cleaning agents. \n
Address Minor Issues Promptly to Prevent Major Breakdowns
\n\nDon't ignore strange noises, leaks, or performance issues. A small problem can quickly escalate into a major, costly repair if left unaddressed.
\n\n- \n
- How to do it: If you notice something off, consult your manual's troubleshooting section or look up solutions online. If it's beyond your comfort level, call a qualified technician. \n
- Usage Scenario: At the first sign of a problem. \n
By incorporating these maintenance tips into your routine, you'll not only extend the life of your kitchen appliances but also ensure they operate at peak efficiency, saving you money and hassle in the long run. Happy cleaning and cooking!
" } ] }:max_bytes(150000):strip_icc()/277019-baked-pork-chops-with-cream-of-mushroom-soup-DDMFS-beauty-4x3-BG-7505-5762b731cf30447d9cbbbbbf387beafa.jpg)